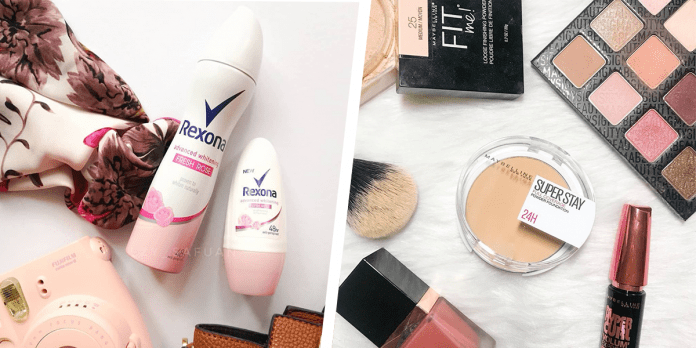
Flatlays are a fun and inexpensive way of effortlessly taking your Instagram from “ordinary” to “stylish”. It allows for visual story-telling and demonstrates a unique snapshot of a moment or day. The good news is that you can use props found in your own home to help tell your special story to your audience. Even better, you don’t need to own the most expensive photography equipment or hire a professional to create aesthetically pleasing and insta-worthy flatlays. With these few tips and a camera phone, anybody can be flatlay expert in no time. Keep reading to learn our 5 flatlay tips for Instagram!
Psst! If you want to have a higher chance at winning The 2020 Try and Review Awards, submit your flatlay image with your reviews! Got writer’s block? Take a moment to check out our Tips To Write A Helpful Review.
1) Tell A Story
Before you start combining your props, hone in on the story or moment of time you are aiming to tell your audience. What are you trying to tell in your visual story? It could be about a day in your life, your reviews on your skincare must-haves, your makeup routine, travel essentials, fashion, what’s in your bag, baby essentials, food…etc. Successful flatlays start with a clear purpose.

2) Choose Props To Complement Your Focus Product
Now that you have a clear purpose in mind, you need to find props that can work to harmonize with your focus product. Have fun with this and choose products that vary in shapes (structured and organic), sizes (big and small) and textures (soft and rough) to add depth and life to your flatlays. However, make sure every prop of the flatlay supports the story and reflects with your theme or personal brand.
Pro Tip: Keep a color palette in mind when you are selecting your props. Color coordination is key to a well-executed flatlay.

3) Choose A Neutral Background
After selecting your props, it is time to choose a clean background for them. If you are a beginner or do not want to spend too much time experimenting with different backgrounds, a clean white background will never fail you. A white background gives you a blank canvas to play with and looks great with any coloured prop. If you feel a little risqué, you can go for white marble, or even textured, furred, glossy, crumpled or laced backgrounds. Just keep in mind to choose a background that won’t distract you from your props.

4) Compose Your Shot
It’s time to put all the elements together. Generally, the item(s) that you want the audience to focus on should be placed in the center. The secondary props should frame your main item(s). If you have additional smaller sized props, you can use them to fill in the spaces. But be sure to keep a nice balance to keep your shot from looking too clutteredKeep arranging the position of the props until you feel satisfied.

5) Shoot in Natural Light
Last but not least, shoot with natural, white light. You want this light to be glowy and diffused to give your flatlay a soft look. This lighting is best achieved during the day with your windows wide open to allow as much natural light as possible to enter your space. Aim for even lighting rather than a beam of light straight down on your flatlay. Try different places around your home until you come upon a spot that gives you the most even lighting.
Pro Tip: Avoid direct sunshine so you don’t get shadows in your flatlay.

And that is it! You are now fully equipped to bring your reviews and your instagram to the next level with these handy tips.
Have fun and don’t forget to tag us @tryandreview


